When it comes to woodworking, a woodworker needs to think about multiple different aspects of woodwork, all at the same time. We need to think about geometry, arithmetic and even some algebra. Using these mathematical analytics we can come up with different designs on our works of art. However, with an ever-expanding market of tools, associated with the rapid advances in technology, our brain sometimes finds it difficult to choose a weapon of choice. That is why compound saws help us to effectively bring our complex “mental-cuts” to life! This article will deal with crown molding using a Compound Miter Saw! Be sure to check out a great way to find tile saws as well.
How to Cut Crown Molding (Molding set flat) – Compound Method
Instructional video:
Step 1 – Make safety your number one priority!
This is probably one of the most “underrated” steps in woodworking. However, whether you are a hardcore woodchipping veteran or a father/son team working on a treehouse, safety should always be your first priority.
Wear appropriate safety gear in order to avoid personal injury and a potentially high medical bill!
1. Protective Glasses
2. Heavy Duty Gloves
3. Protective Face Mask/Shield
When working with wood, always remember that solid wooden dust is released into the air and these fine particles can cause serious harm to your Lungs and other organ surface tissues!
Step 2 – Preset Testing!
Remember to first test the presets we mentioned on scrap materials, before you decide to start working on your project. You may want to make slight angular adjustments to give your work your own signature finish! Always remember to test your presets first.
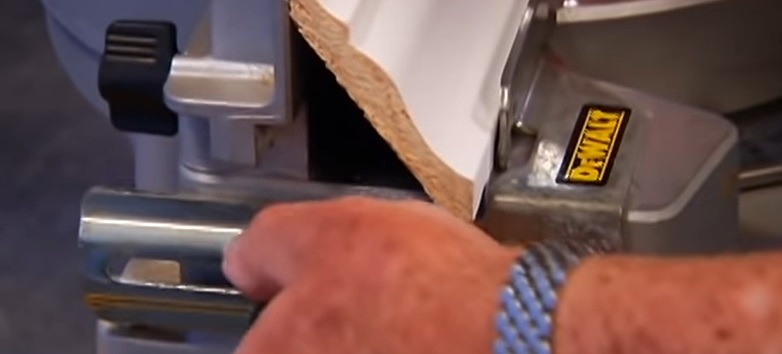
Using a compound saw is great for making crown molds because you can lay your material flat and get good stability. The accuracy achievable using these machines, is crazy!
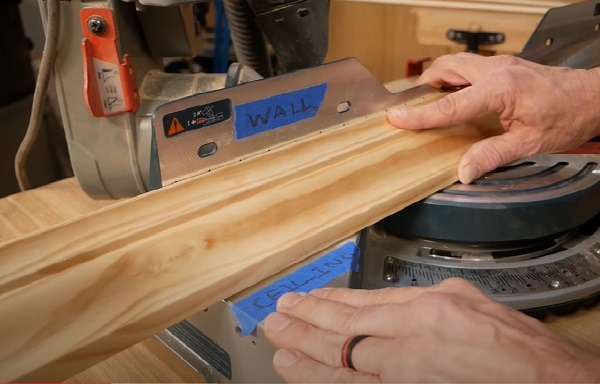
Step 3 – Labeling Your Setup
Now, before you begin, try to picture your end goal in your mind. If you are creating a frame for a door, label your miter saw as shown above. This makes the job a lot easier and ensures fewer mistakes. Also label the top bottom and left and right edges of your crown mold, in order to avoid any mishaps. Efficiency is key in any industry!
Step 4 – Setting The Miter Saw Table
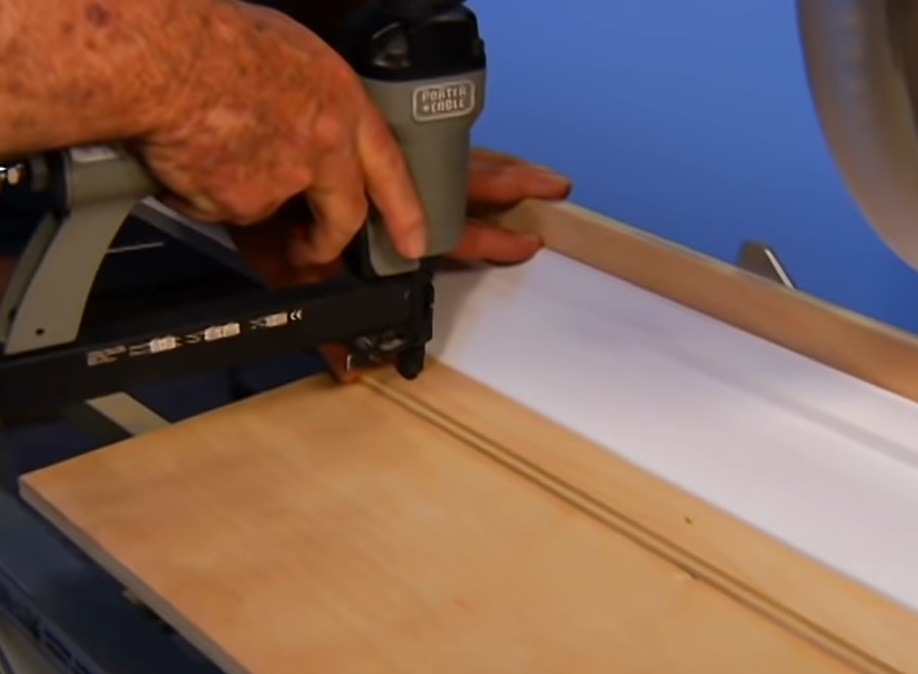
In order to make these compound cuts make sure your fence is high enough to hold the top of your mold in place. Some compound miter saws come with accessories and attachments made specifically for crown molds.
If your saw doesn’t come with such extra attachments, consider upgrading or set up a jig as outlined in the instructional video.
Step 5 – The Geometry
As mentioned your mold will lay flat against your miter fence, so when making the inside, outside, left and right crown mold cuts, remember to first label your crown molding carefully. If you have a compound miter saw, the angle presets we mention will either be marked on the bevels or will have positional locks already in place.
How to cut Crown Molding Inside Corners
- First, place the top of your molding against the fence. This is very important.
- For the inside left corner, set the bevel to the left at 33.9° and the miter table 31.6° to the right. You will save the left piece after your cut.
- For the inside right corner, set the bevel to the right at 33.9° and set the miter table 31.6° to the left. You will save the right piece after your cut.
How to cut Crown Molding Outside Corners
- First, place the top of your molding against the fence. This is very important.
- For the outside left corner, set the bevel to the right at 33.9° and set the miter table 31.6° to the left. You will save the left piece after your cut.
- For the outside right corner, set the bevel to the left at 33.9° and the miter table 31.6° to the right. You will save the right piece after your cut.
That’s All Folks!
If you follow our instructions precisely, we have no doubt that you are now an expert at chopping up the beautiful work of art that is crown molding. Thanks for dropping by. Good luck on crafting your wooden masterpiece!


